
Artifacts and interviews: saving what makes your family unique
Records tell you when someone was born. The things your family kept help tell you who they were: the recipe card in Grandma's handwriting, the letters home, the medal in the drawer, the story Uncle Joe tells every Thanksgiving. This page covers how to gather them, keep them safe, and give them a place in your book.

Part 1: Interviewing relatives
The memories of your oldest relatives are among the family records most easily lost. An hour of conversation can preserve stories you may not find anywhere else.
Before you start
- Ask first, and tell them why: "I'm making a family history book, and I'd love to include your memories."
- Ask whether you can record. A recording preserves their voice and exact words, and frees you to listen instead of taking notes.
- Bring prompts: old photos, a map of the old neighborhood, a family tree printout. A picture may bring back memories that a question doesn't.
- Keep it manageable. Forty-five minutes to an hour may be plenty. Let their comfort and energy guide you, and plan to come back if there's more to discuss.
Questions that open doors
- Where did you grow up? What did the house look like?
- What were your parents like? Your grandparents?
- What did your family do for fun? For holidays?
- What jobs did you have? What was your first one?
- How did you meet your husband or wife?
- What was hard about those years? What got you through it?
- Is there a story the family always tells about you?
- What do you want your great-grandchildren to know?
During the interview
- Ask open questions, such as "Tell me about…", then follow where the story goes.
- Ask one question at a time, and let it be answered before moving on.
- Allow time for pauses. More memories may come as they think.
- Ask how they know something, not just what they know.
- Ask for names, places and approximate dates as they come up. These will help you follow up later.
- Ask about people in the photos while you have them: who, where, when, and who took the picture.
- Save corrections and arguments for later, if at all.
- Ask permission before a sensitive subject, and respect anything they don't want to discuss or include.
Afterward
- Thank them, and offer them a copy of the recording or what you write.
- Write down names and places while they're fresh. Keep the interview date and the names of the people who took part with the recording.
- Check uncertain names, dates and places against other records where possible. Memories are valuable, but details can become confused over time.
- Ask if they're comfortable with what they've shared, including in the book or online. Give them a chance to review sensitive passages before sharing them.
In FanChartBook Deluxe
- The Interviewer helps you prepare for and conduct a guided interview, with 59 suggested questions in 12 topics and room for follow-ups. A relative who can't be there can record their own questions, and those can be woven in with the answers.
- Story Recorder records a relative telling their story in their own words, or brings in a recording you already have. Mark the passages worth keeping, put them in the order that tells the story best, and FanChartBook joins them into one finished recording. Your original recording is never changed.
- Audio Cleaner reduces hum and hiss in an old or noisy recording before you transcribe it.
- Audio Transcriber turns a recording into a written transcript, saved as a Word document. It's a draft. Be sure to check names, places and unclear passages.
- Interview Transcriber turns a transcribed interview into pages for your book and merges the relative's words into their life sketch. It uses only the passages you've checked against the recording, with photos and captions. It adds no wording of its own. The recording stays the authority.
Everything runs on your computer. Recordings and transcripts are never uploaded.
Part 2: Scanning and caring for photos and papers
Make digital copies, then store the originals safely. A good scan preserves a copy of the image even if the original fades or is lost, and lets other branches of the family have a copy. Keep the originals too. Digital files have their own risks and need backups.
Scanning
- Use a flatbed scanner for loose photos and papers in good condition. A phone or camera can also work well with good, even light and no glare. Don't put fragile originals through an automatic document feeder or force a book flat on a scanner.
- For most photo prints, 600 dpi (dots per inch) is a useful starting point. Small prints you want to enlarge may benefit from 1200 dpi. Slides and negatives need a scanner designed for film and usually a higher resolution, often 2400 to 4000 dpi.
- Scan most documents at 300 to 400 dpi. Use a higher resolution for small or faint writing, and scan in color when it helps preserve faded ink, pencil marks or other details.
- Save a master copy in a lossless format, such as TIFF or PNG, and leave it unedited. Make edited copies from it.
- Scan the back too, if anything is written there.
- Name files so you can find them. "1922 Walter and Alice wedding.tif" is more useful than "IMG_0457.tif." If a date or identification is uncertain, say so in your notes.
- Keep your working copy and at least two backups, with one backup somewhere else, such as a cloud backup service or an external drive stored away from home.
Caring for originals
- Store photos and papers somewhere cool, dry and dark, such as an interior closet. Avoid hot attics, damp basements and garages. Keep boxes off the floor and away from possible leaks.
- Use acid-free, lignin-free folders and boxes. For photographs, look for storage materials that have passed the Photographic Activity Test (PAT). Avoid PVC sleeves and old "magnetic" albums with sticky pages. Don't pull photos loose if they're stuck.
- Handle papers with clean, dry hands. Handle photos by the edges, avoiding the image surface. Clean nitrile gloves can help protect photographs from fingerprints.
- Label the folder or sleeve before putting the item inside. If you need to write directly on a paper photo, use a soft pencil lightly along the back edge, only if the surface accepts it without pressure.
- Don't laminate, tape or glue originals you want to preserve. Use photo corners or suitable sleeves instead.
Part 3: Heirlooms and keepsakes
The quilt, the Bible, the watch, the trunk. An heirloom means more when its story stays with it. Record what you can while someone still knows.
For each heirloom, write down:
- What it is, with photos from a few angles. Include a ruler beside it in one photo to show its size.
- Who owned it first, if known, and who has owned it since.
- Where it came from and how it came into the family.
- Why it was kept and what it meant to its owners.
- Where it is today and who has it now.
- Who provided the information and which details are uncertain.
In FanChartBook Deluxe, Keepsakes & Heirlooms records all of this. It records the maker or first owner, year and place, material and size, marks and inscriptions, condition, who it passed down to, where it is now, how you know, the people connected to it, and its photos and story. Each keepsake prints on its own page and can be included in a Keepsakes appendix of your book. The life sketches of the people connected to it point there.
Part 4: Restoring old photos, honestly
A faded, scratched or torn photo can often be improved. A few principles help preserve its value as a family record:
- Always keep the original scan. Restore a copy.
- Repair damage without deliberately changing the scene. Removing a scratch is restoration. Removing a person or adding one changes the historical image and should be labeled as an alteration.
- Review AI repairs carefully. AI may invent details where the original is damaged or unclear, including facial features, clothing and lettering. A sharper image isn't necessarily a more accurate one.
- Colorization is an interpretation. Unless you have reliable references, added colors are estimates, not a record of the actual colors. Label the image as colorized when you share it.
- Note what you changed and keep that information with the edited image, so someone who finds it later knows what was done.
In FanChartBook Deluxe
- Photo Enhancer crops and straightens a crooked scan (Auto-straighten can find the angle), reduces grain, balances the light, enlarges and sharpens. Your original file is kept.
- Photo Repair blends away dust, scratches and stains. Draw a loop around the damage, or let it find damage for you, and use the restore brush to undo anything you don't like. Where damage crosses a face, the screen tells you the repair may blur or smear, so check it closely.
- Photo Colorizer adds estimated color to a black-and-white photo.
- Ancestor Photos gives each ancestor one portrait, printed small beside their life sketch.
All of them run on your computer. Your photos never leave it.
When you prepare a restored photo for your online family tree, FanChartBook lists each change it actually made, such as cropped, straightened and colorized, and a colorized photo notes that the added color is an AI estimate, not the original coloring. You review it and add it to your tree yourself.
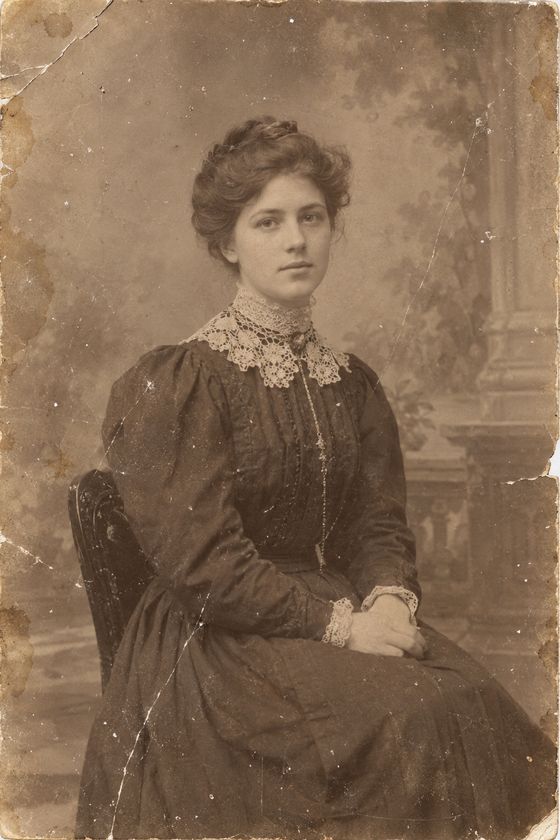 Original (AI-generated sample)
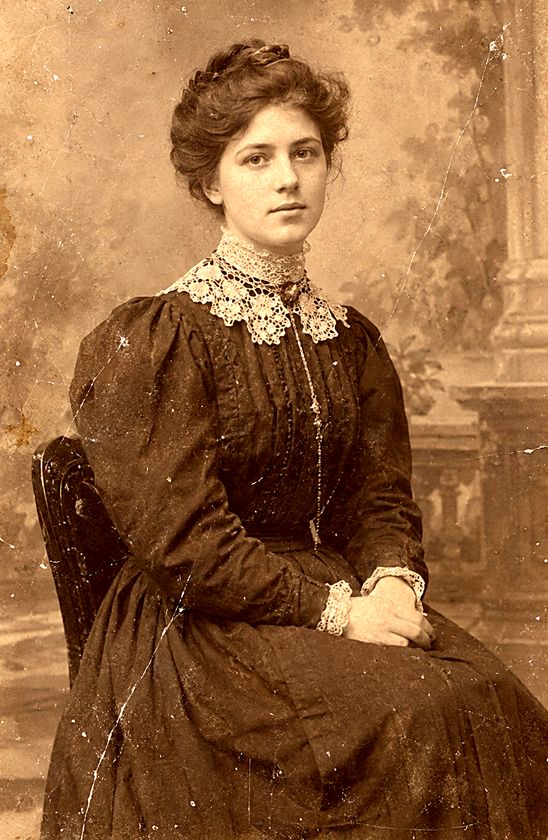 Photo Enhancer
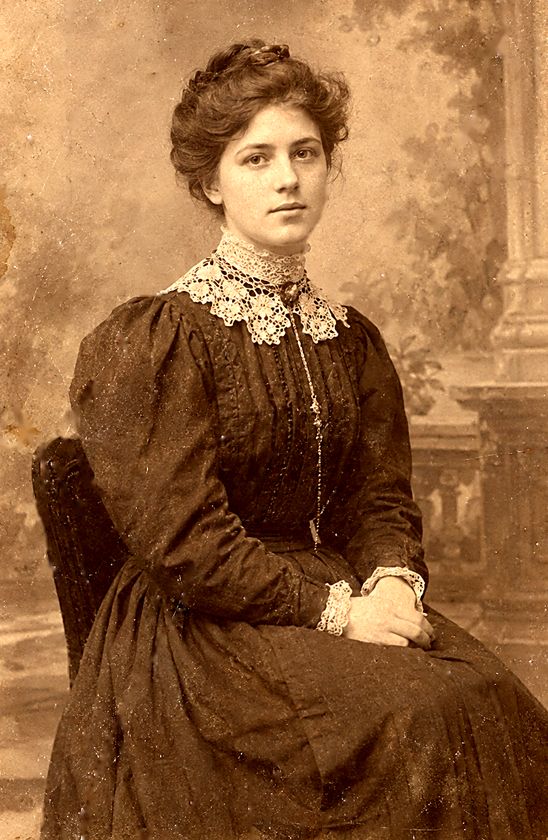 Photo Repair
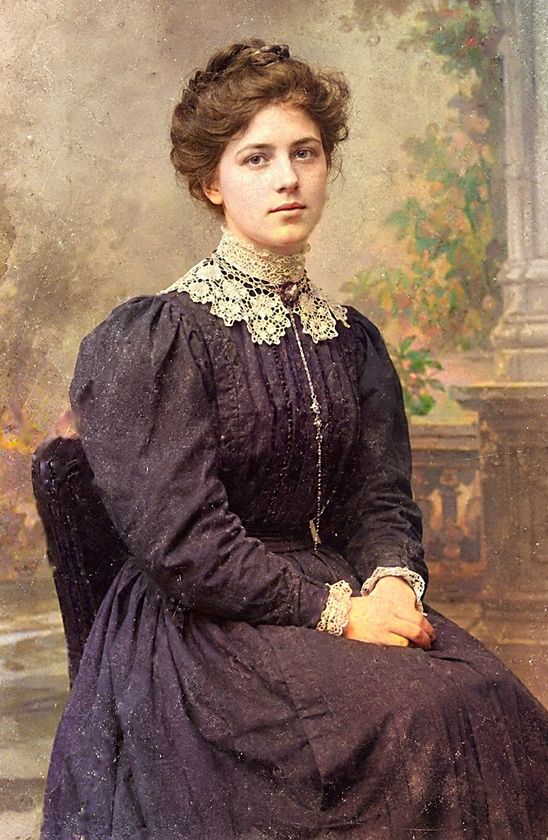 Photo Colorizer
Give it all a home
Interviews, photos and heirlooms help turn a family tree into a family history. Adding them to your book gives the next generation the stories along with the names.
How they get into your book:
- Portraits and keepsakes can go in without any extra steps. Once you give an ancestor a portrait in Ancestor Photos, it appears beside their life sketch. Each keepsake you record can have its own page in the Keepsakes appendix. Untick "Print this keepsake in the book" to leave one out.
- Everything else goes in when you choose. Restored photos, transcripts and interview pages are saved with your project. Select "Add to book" and choose where each goes: with a person, in a section, or with your project materials. It works for the Word book and the web book.
- Recordings themselves stay on your computer. Their transcripts and interview pages are what can go in the book.
- See a filled-in sample book
- Share your finds on your online family tree
Product and company names mentioned here belong to their owners. Peepsock Press, LLC is not affiliated with or endorsed by them.